Overview
eptos Document Manager offers users a harmonized graphical user interface for the management of Documents.
When opening the manager, the users see the menu (representing workspace areas for the managed Documents) on the left side. The visibility of the menus is controlled by user rights.
Workspace areas can be accessed by clicking on a specific menu. The workspace area is displayed on the right side of the screen and starts with a tabular view of the Documents managed in respective workspace.
eptos differentiates throughout all managers between a graphical user interface language and a content language. The language of the graphical user interface and of the maintained content can be set individually. Users can therefore work with graphical user interface language set in English / German and content language set to another language (e.g. French).
For Documents without translation in a selected content language, the system uses the default system language as fallback and signals the missing translation with an exclamation mark inside a yellow triangle in front of the text.
The following business objects are managed in Document Manager:
The graphical user interface of the eptos Document Manager consists of the following main areas:
-
Tabular view: available for all Document Manager business objects
-
Detail view: available for all Document Manager business objects
-
Create view: available for all Document Manager business objects
-
Edit view: available for all Document Manager business objects
All Document Manager business objects share a set of basic functionalities. Specifics related to these basic functionalities in connection with the different Structure Elements are described in the specific chapters of respective business object.
Basic functionalities are:
-
Search: allows users to search for specific Documents
-
Create: allows creation of new business objects
-
Change Text: allows editing of existing business objects
-
Delete: allows deletion (deprecation) of existing business objects
-
Assign: allows connection to Structure Elements
-
Download: allows the export of Document Manager Document files
-
Import: allows the import of Documents and Document assignments
The following section describes the main areas of the graphical user interface and some basic functionalities. Further information on basic and specific functionalities are described in the specific chapters of respective business objects.
/*<![CDATA[*/ div.rbtoc1770892089448 {padding: 0px;} div.rbtoc1770892089448 ul {list-style: disc;margin-left: 0px;} div.rbtoc1770892089448 li {margin-left: 0px;padding-left: 0px;} /*]]>*/ Overview Tabular View Quick Search Advanced Search Sorting Filter Filter Sets Create Filter Set Edit Filter Set Delete Filter Set Define as Group Filter Set Set Filter Set as default Select Filter Set Detail Page (Meta-Information) Detail Page (Complete Content) Create view Edit view
Tabular View
All Document Manager business objects are organized in a tabular view. This is the default view when the user enters the workspace area of a specific business object.
The tabular view offers users the possibility to browse and search the available business objects.
Moving from one page to the next page and back is possible via the Next/Previous buttons available in the left top of the table. In front of the Next/Previous buttons, the system displays the number of results found for a specific query.
The tabular view is configurable according to users' needs from the configuration panel located in each tabular view above the list, on the far right hand side (gear wheal symbol). From this column management dialog columns can be set as hidden / visible, the order of columns can be changed and user can add / remove link to the data displayed in relevant column.
System allows user to search for columns in the dialog list so that these actions of column management can be performed quicker, since user can search for and find the needed column via a search function instead of manual scrolling.
User can also configure the number of results displayed per page (available option 15, 25, 50, 100 results per page in the right top of the table).
In these tabular view columns the Documents standard and extended attributes are represented. The columns have sorting and filtering options and their width can be adjusted as needed.
Moreover, system offers user the harmonized search feature.
In the Tabular view user has also has an export to excel function guarded by specific user rights for exporting all visible columns.
The tabular view offers users the following options:
.png?cb=ca4fa4535570f9d06348c887390bfce3)
|
No. |
Name |
Description |
|---|---|---|
|
1 |
Selection box |
Allows users to select the Document which will be worked on. |
|
2 |
Search field |
Allows users to enter their search string in order to easily retrieve needed data. |
|
3 |
Advanced search |
Allows users to define in which attributes and with which options the search will be performed. |
|
4 |
Navigation buttons |
Allows users to navigate to next pages or back to previous pages. |
|
5 |
Column headers |
Allows uses to sort the content of columns respectively to filter the content for a better retrieval of results. |
|
6 |
Toolbar |
Allows users to work on the data displayed in the tabular view. |
|
7 |
Configurable table view |
Allows user to view available content in an organized way, which may be configured to their own needs. |
Quick Search
Document Manager tabular view offers a "Search" functionality with harmonized search criteria and options in case of Documents. The search can be triggered by selecting Search option.
Tabular views have a sticky header that allows user to see the column headers even if displayed entries on page are set to more than 15 and user needs to scroll down.
Advanced Search
The advanced search can be opened by selecting the Advanced Search arrow situated below the search field.
The following harmonized choice is available for "Search In" (Radio Buttons: only 1 can be selected):
|
Search in |
Enter query |
Explanation |
|---|---|---|
|
ID |
Ex.: PAR-AKB116-001 |
Item data contained in the identification (IRDI, SCV, Code) |
|
Preferred Name |
Ex.: Gripper Jaw |
Item data contained in column Preferred name |
|
All fields |
Ex.: Notebook |
Full Text Search. Search in all Fields and Extended Attributes (which cannot store only Numbers or a flag) |
Note: the field where the search query is typed cannot contain wildcards (ex.: *, %.).
The following harmonized choice is available as "Search options" (Radio Buttons: only 1 can be selected):
|
Search options |
Enter query |
Results |
Explanation |
|---|---|---|---|
|
Match fragments (equals old "Fragment Search") |
Ex.: "Rubber gasket" |
Ex.: "Gasket with rubber collar", "Rubber collar for gasket", "Gasket", "Rubber gasket", "Cylinder with rubber gasket", "Cylinder with rubber gasket (not specified)", "Rubber gasket (not specified)". |
Matches all fragments from the input (split by space) separately. System finds all entries containing these strings even if they are not in this entered order. |
|
Match all from start (equals old "Match pattern from start" + "Fragment Search disabled") |
Ex.: "Rubber gasket" |
Ex.: "Rubber gasket", "Rubber gasket (not specified)". |
Matches the whole input from start. System returns only and all results which start with the search query. |
|
Match all |
Ex.: "Rubber gasket" |
Ex.: "Rubber gasket", "Cylinder with rubber gasket", "Cylinder with rubber gasket (not specified)", "Rubber gasket (not specified)". |
Matches the whole input in any position. System returns all results which contain search query as a block, no separated. |
Sorting
The columns in the Tabular view offer sorting possibilities. Sorting the results in ascending/descending order is possible by clicking on the column header. An arrow situated in front of the header, pointing upwards or downwards indicates that respective column is already ascendingly or descendingly sorted.
%20(1).png?cb=e8b1c3c361dc4f64aa484575668266ee)
Filter
The columns in the tabular view offer also filtering possibilities. Filtering the results is possible via the filters placed in the left side of the column header:
.png?cb=273bae449cc6596b1d460e5c49762ea9)
.png?cb=ae1b8847dcf795e6b37b4bfb1cf33551)
.png?cb=a8d023d469ecf042eae6d822e6345681)
|
No. |
Filter Type |
Description |
|---|---|---|
|
1 |
Free text input |
Columns representing attributes with free text input allow users to further refine the search results by additional search in respective attribute |
|
2 |
Predefined list of values |
Columns representing attributes with predefined list of possible values allow users to further refine the search results by selecting one or more of the predefined values for respective attribute. |
|
3 |
Date |
Columns representing dates allow user to filter the search result base on a specific date (e.g. creation date, version date etc.). |
Filter Sets
Several set column Filters can be stored together as Filter Sets.
They help Users in lists to store and apply the column Filters of the respective tabular view. By using Filter Sets, Users do no longer need to manually select often-used column Filters again and again.
The drop-down containing the available Filter Sets in a list is available on the right of the Navigation buttons. If no specific Filter Set is defined as default for respective list "(No set)" is displayed.
Create Filter Set
In order to Create a new Filter Set the User needs to select option "Configure filters sets" on the right of the Set drop-down.
System opens the Manage filters sets interface. Here the User needs to select option "Create a new filters set", then fill in the Name of the Set to be created, then select option Create. The new Set will be displayed at the bottom of the list. At this point, only the empty Set is available by Name only. The User now needs to add the actual Filters he needs to this Set.
In order to do so, he needs to follow the three steps below:
-
select the newly created Set by pressing the radio button on its right, in the Filter Set drop-down
-
set desired Filters to desired columns
-
select Save filters sets option on the right of the "Configure filters sets" option.
Note: system does not allow creation of two Filter Sets with the same name for the current User.
Edit Filter Set
Filter Sets can be edited both what their Name and what their contained Filters are concerned.
In order to edit the Name of a Set, the User first needs to select option "Configure filters sets" on the right of the Sets drop-down. System opens the Manage filters sets interface. Here the User needs to select Edit filters sets icon on the right of the Set to be edited. System opens the interface in which the Name can be edited, including Update option, to be pressed after change is done.
In order to edit the Filters contained in a Set, the User has two possibilities:
-
remove Filters currently available in a Set → this can be done by expanding the respective Set in the Set drop-down and clicking the Clear filter icon available on the right of the Filter to be removed
-
add Filters to selected Set → this is done by selecting the respective Set in the Set drop-down, setting the desired additional Filters in respective columns and then selecting Save filters sets option on the right of the "Configure filters sets" option.
Delete Filter Set
In order to delete a Filter Set, the User first needs to select option "Configure filters sets" on the right of the Set drop-down. System opens the Manage filters sets interface. Here the User needs to select the Delete filters sets icon on the right of the Set to be deleted. System then asks for confirmation and, as soon as the User selects Delete option, list is updated by having respective Set removed.
Define as Group Filter Set
This functionality is available only for Base Module Administrator User and it helps defining specific Sets as Group Filter Sets. On condition that Base Module Administrator User connects these Sets to the Group, all Users belonging to respective Group will have access to these Sets.
In order to define a Set as Group Set, the User first needs to select "Configure filters sets" option on the right of the Set drop-down. System opens the Manage filters sets interface. Here the User needs to select the Define as group filters sets icon on the right of the desired Set. The icon turns from grey to black, in order to signal the change.
Group Filter Sets cannot be renamed or deleted by regular Users.
Set Filter Set as default
System offers 2 distinct possibilities to set a filter set as default:
-
at user level (defined by each user and being applied only for that user)
This functionality helps Users define specific Sets as default.
In order to define a Set as default, the User first needs to select "Configure filters sets" option on the right of the Set drop-down. System opens the Manage filters sets interface. Here the User needs to select the Set default filters set icon on the left of the desired Set. The icon turns from grey to black, in order to signal the change.
The effect of this setting is that every time the User re-enters respective page, the default Filter Set will be pre-selected.
-
at menu level (defined by Administrator for each menu entry and being applied for all users in that menu entry)
User with Base Module Administrator rights has also the possibility to select an existing filter set as default for a certain tabular view or remove it as default.
This is configured from Base Module / Configuration / Configurable menu where administrator needs to select the needed menu entry, then select the desired filter set in field "Default filter set“ and select Save option.
The result is that all users entering that specific tabular view, will have the pre-selected default filter set already applied to list.
Select Filter Set
System allows Users in all tabular displays to select a Filter Set from the available list. The filters belonging to selected Set will be immediately applied and the name of the currently applied Set is displayed in the box.
The list of available Filter Sets is comprised of:
-
Own Filter Sets
-
Filter Sets inherited by Role/Group of the current User
Only Users having Base Module Administrator role assigned will see all Filter Sets from all Users.
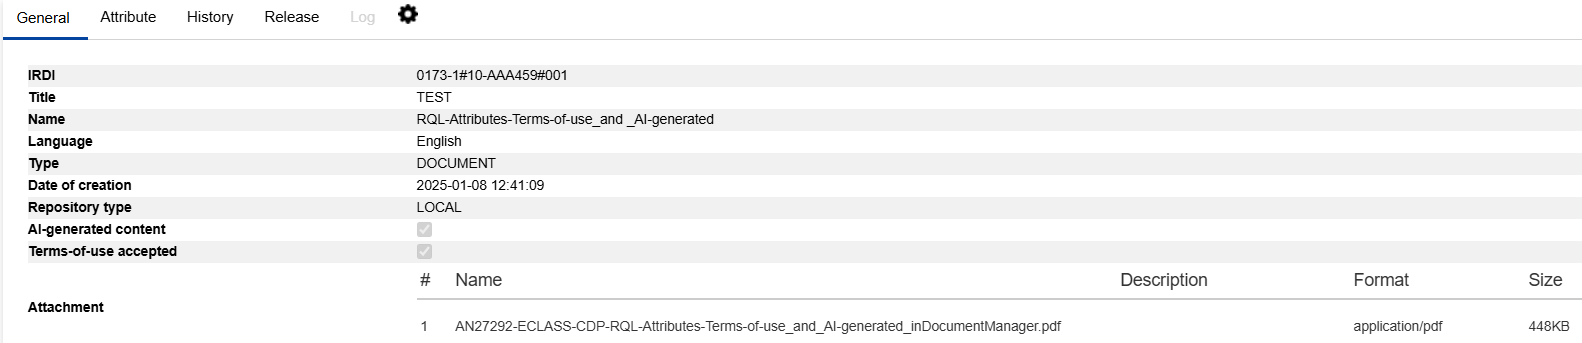
Detail Page (Meta-Information)
From the Document Tabular view, the user has the possibility to open a Document in a view mode where all the meta-information of the Document is displayed.
This view is opened by clicking any of the attributes of the desired Document that are provided with a link (ID, IRDI).
Above the Details view is displayed an options bar containing Favorites option which allows user to set respective Document as favorite.
Tabs where no information is available are not active and are displayed grayed-out.
For more details and a table with tab and attributes description, please see page Browse, chapter "Document Meta-Information".
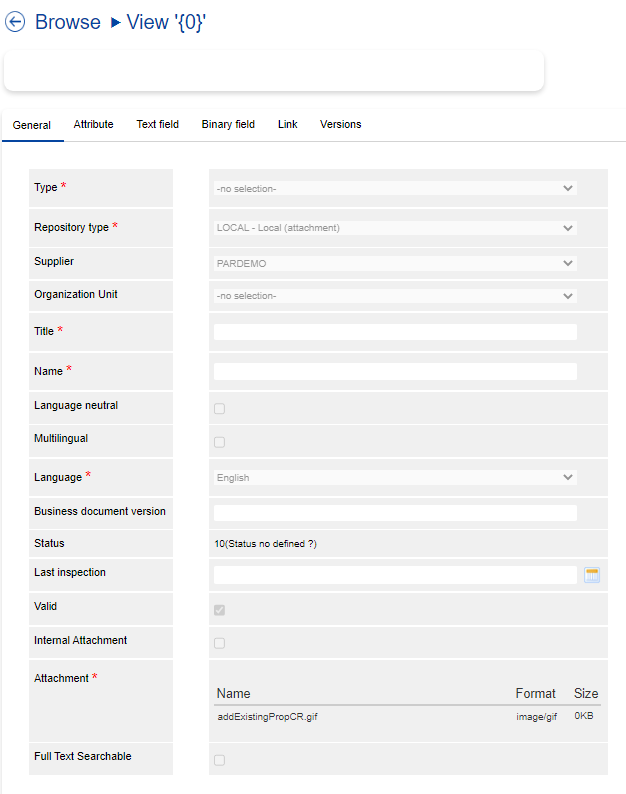
Detail Page (Complete Content)
Apart from the Detail view that allows user to see meta-information of Document, user has the possibility to open a Document in view mode to see the complete content.
This is done from Document Tabular view by selecting a Document and pressing option View.
Details on the content displayed in the Details page may be found on page Browse, chapter "View".
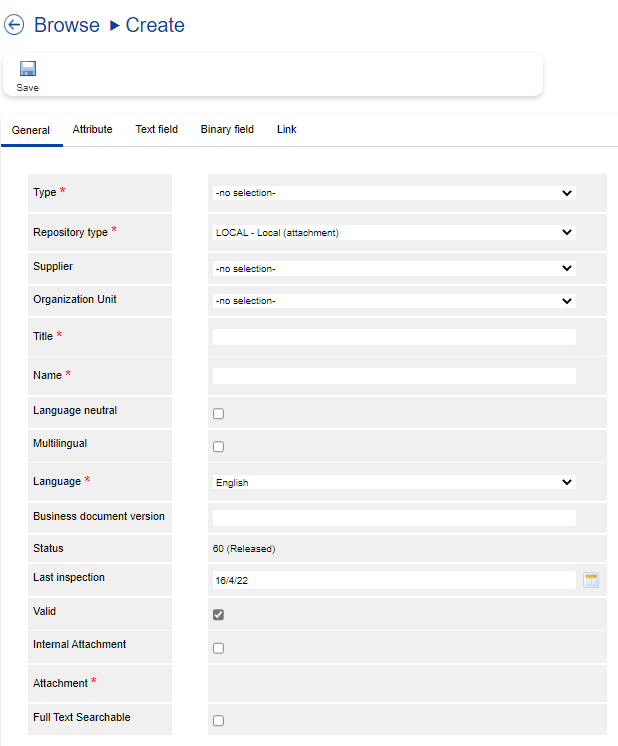
Create view
The workspace area for Document Creation can be accessed via toolbar option Create in menu entry Browse.
For a complete description of all functions, please see chapter "Create", page Browse.
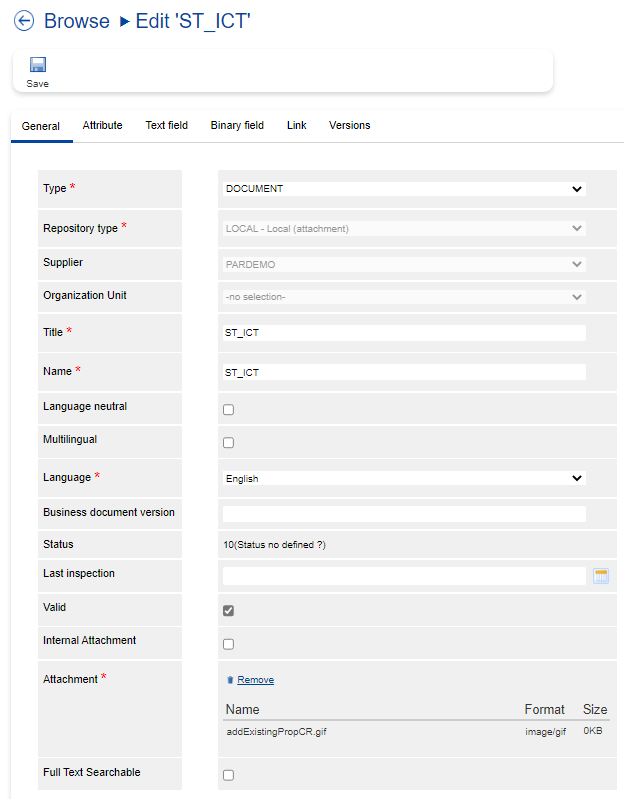
Edit view
User may access the workspace area for editing a Document from menu entry Browse via toolbar option Edit.
Here user may change all editable attributes belonging to the selected Document.
For a complete description of all editing functions, please see page Browse, chapter "Edit".